
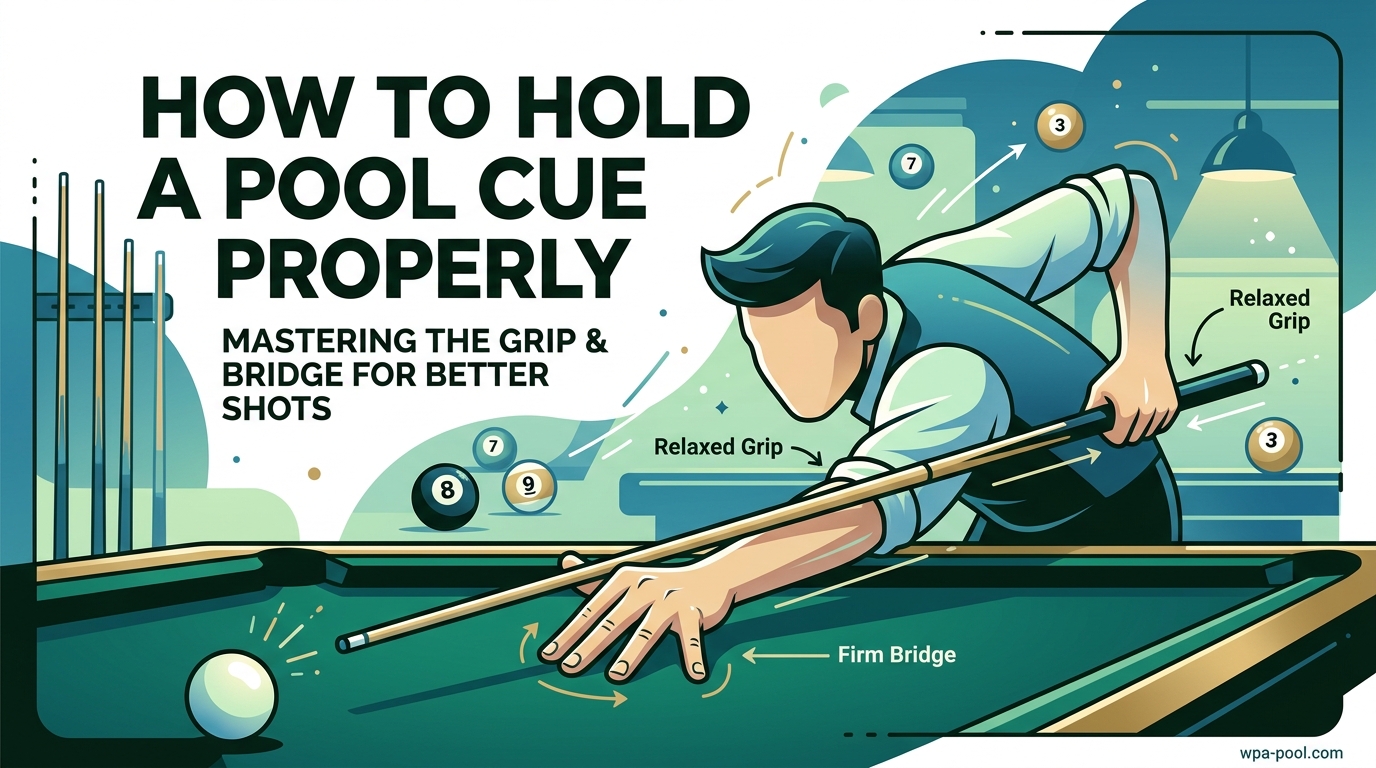
Learning how to hold a pool cue properly is the foundation of every great shot in billiards. I have spent years watching beginners struggle because they grip the cue too tightly or position their hands incorrectly. A proper grip transforms your game from inconsistent misses to precise cue ball control.
In this guide, I will walk you through every detail of holding a pool cue like a professional. You will discover the exact grip pressure that works, how to form your bridge hand for stability, and the stance that keeps your cue level. Whether you are picking up a cue for the first time or refining your technique, these fundamentals will make an immediate difference in your accuracy and confidence.
Let us start with the most important element: your grip hand.
Table of Contents
How to Hold a Pool Cue Properly: Step-by-Step
The proper way to hold a pool cue involves finding your balance point, positioning your dominant hand correctly, and maintaining a relaxed but controlled grip. Follow these six steps to build a solid foundation.
Step 1: Find the Balance Point of Your Cue
Every pool cue has a natural balance point where the weight distributes evenly. Slide your cue across your index finger until it rests horizontally without tipping either direction. This spot is usually 4 to 6 inches from the bottom of the butt.
Mark this point mentally. Your grip hand should rest slightly behind this balance point, about 2 to 4 inches back, giving you natural leverage without fighting the cue’s weight.
Step 2: Position Your Grip Hand on the Butt
Place your dominant hand on the cue so your palm faces upward. Wrap your fingers loosely around the butt. Your thumb should rest on the side of the cue, pointing toward the floor.
Avoid gripping near the very end of the cue. Many beginners make this mistake, thinking it gives more power. Instead, it reduces control and creates unnecessary tension in your forearm.
Step 3: Use the Baby Bird Grip Technique
Professional player Jasmin Ouschan popularized the “baby bird” analogy for grip pressure. Imagine holding a small bird in your hand. You want to keep it secure without squeezing too hard and hurting it.
Apply this same principle to your cue. Your grip should be firm enough that the cue does not slip, but relaxed enough that you can feel the natural weight of the cue moving freely through your fingers.
Most of the control comes from your thumb, index finger, and middle finger. Your ring finger and pinky provide light support without squeezing.
Step 4: Keep Your Wrist Loose and Relaxed
Tension in your wrist destroys accuracy. As you prepare to shoot, check that your wrist hangs naturally from your forearm. There should be no bend or twist forcing the cue off line.
Your forearm should hang vertically beneath your elbow when you are in position. This vertical alignment allows a smooth pendulum motion without compensating for awkward angles.
Step 5: Align Your Forearm with the Cue
When you are down on the shot, your forearm should align directly behind the cue. Your elbow acts as the pivot point for your stroke. Think of your arm as a pendulum swinging from the elbow.
If your elbow sticks out to the side, your stroke will push the cue off line. Keep everything in a straight plane from your grip hand through your forearm to your elbow.
Step 6: Maintain Consistent Pressure Throughout the Stroke
The most common grip mistake is tightening up during the actual shot. Players get nervous and squeeze the cue harder as they strike the ball. This creates jerky motion and reduces accuracy.
Practice keeping your grip pressure constant from your warm-up strokes through the final follow-through. The only movement should be your forearm swinging like a pendulum. Your grip stays relaxed and unchanged.
Mastering Your Bridge Hand
Your bridge hand provides the foundation for every shot. Without a stable bridge, even perfect grip technique cannot save your accuracy. Learn these four bridge types to handle any situation at the table.
Open Bridge Technique
The open bridge works best for beginners and for shots requiring elevation. Spread your fingers on the table surface to create a stable base. Raise your knuckles slightly off the cloth.
Curl your thumb inward toward your palm. Rest the cue shaft in the V-shaped groove formed between your thumb and the base of your index finger. This groove guides the cue straight without gripping it.
Keep your bridge hand 6 to 8 inches from the cue ball. This distance provides stability while giving you room for your stroke. The open bridge allows you to see the cue tip clearly, which helps beginners learn to aim.
Closed Bridge Technique
Advanced players prefer the closed bridge for its added stability. Form your open bridge first, then wrap your index finger around the cue shaft. Your finger creates a loop that surrounds the cue.
The cue slides through this finger loop during your stroke. The closed bridge prevents the cue from wandering side to side, especially on powerful shots like the break.
Practice transitioning between open and closed bridges. Some shots work better with one style than the other. A comfortable closed bridge takes time to develop, but the improved stability is worth the effort.
Rail Bridge for Tight Situations
When the cue ball sits close to the cushion rail, a standard bridge becomes impossible. The rail bridge solves this problem. Place your bridge hand on top of the rail itself.
Form a groove with your thumb and index finger at the edge of the rail cushion. The cue shaft rests in this groove and slides along the top of the cushion. Keep your bridge hand steady against the wood for stability.
Practice this bridge before you need it in a game. The angle feels different from a standard bridge, and the cushion rubber affects how the cue slides.
Elevated Bridge Technique
Sometimes you must shoot over an obstacle ball. The elevated bridge raises the cue shaft above the interference. Form a fist with your bridge hand and place it on the table.
Rest the cue shaft on top of your knuckles or between your first and second knuckles. Your fist acts as a raised platform keeping the cue level above the obstacle. Keep your wrist and forearm steady to prevent wobbling.
This bridge requires extra focus on keeping the cue level. Practice on simple shots before attempting difficult elevated positions.
Mechanical Bridge for Hard-to-Reach Shots
When the cue ball sits too far for your natural reach, use a mechanical bridge. These tools rest on the table rail and extend your reach. Place the bridge head near the cue ball.
Lay the cue shaft in the notch of the bridge head. Keep your grip hand in its normal position near your body. The mechanical bridge provides the support your bridge hand normally would.
Stroke smoothly without jerking the cue. The mechanical bridge removes some feel from your shot, so focus on a clean follow-through.
Stance and Body Positioning
A great grip and bridge mean nothing without proper body positioning. Your stance creates the platform for consistent shot-making. Here is how to position yourself for every shot.
Feet Positioning
Stand with your feet shoulder-width apart. Your back foot should align with your shooting line, pointing toward the direction of the shot. Your front foot steps forward at about a 45-degree angle.
Most players place their front foot about 18 inches from the cue ball when they bend into position. Experiment with distance to find what feels natural for your body size.
Your weight should distribute evenly between both feet. Some players prefer slightly more weight on the front foot for stability. Others keep weight balanced for freedom of movement.
Hip Alignment
Keep your hips square to the table as you bend down. Twisting your hips throws off your alignment and forces you to compensate during the stroke. Your body should face the shot direction naturally.
Bend forward from your waist while keeping your back relatively straight. Your bridge arm extends forward while your grip arm hangs naturally from your shoulder.
Keeping the Cue Level
A level cue is essential for accurate shot-making. When you are in position, check that your cue runs parallel to the table surface. Many beginners accidentally tilt the cue upward or downward.
An upward tilt causes the cue ball to hop slightly off the cloth. A downward tilt changes the contact point on the object ball. Both problems create inconsistency.
Use your bridge hand height to adjust cue level. Raise or lower your knuckles until the cue sits flat. Practice this check before every shot until it becomes automatic.
Common Mistakes to Avoid
After teaching hundreds of players, I have seen the same errors repeat constantly. Recognizing these mistakes helps you avoid developing bad habits.
Gripping Too Tightly
The most damaging mistake is the death grip. Players squeeze the cue like their life depends on it. Tension spreads from your hand up your arm and into your shoulder. Your stroke becomes rigid and jerky.
Remember the baby bird analogy. You need just enough pressure to control the cue, nothing more. If your knuckles turn white, you are gripping too hard.
Wrist Tension During the Stroke
Many players lock their wrist straight or bend it awkwardly. Your wrist should hang naturally without conscious effort. Tension here destroys the fluid motion your stroke needs.
Practice shots focusing only on wrist relaxation. Let your wrist move naturally with the pendulum motion of your forearm. Do not force it into any position.
Bridge Hand Instability
A shaky bridge hand ruins accuracy before you even stroke the cue. If your bridge fingers spread too wide or shift during the shot, the cue cannot slide straight.
Press your bridge hand fingers firmly into the table cloth. Spread them enough for stability but not so wide that your hand feels stretched. Your bridge hand becomes part of the table during the shot.
Inconsistent Follow-Through
Players often stop their stroke the moment the cue tip hits the cue ball. This abbreviated motion reduces power and accuracy. Your cue should continue forward naturally after contact.
Think about stroking through the cue ball, not just to it. Your cue tip should finish several inches past where the cue ball sat. This complete follow-through ensures clean contact and proper spin transfer.
Choking Up on the Cue Incorrectly
Moving your grip hand closer to the cue ball, called choking up, helps with delicate touch shots. However, doing this wrong destroys your mechanics. Some players grip too tightly when choked up, while others lose their bridge distance.
When you choke up, maintain your normal grip pressure and technique. Only the position of your hand on the cue changes. Keep your bridge at the proper distance from the cue ball.
Ignoring the Balance Point
Every cue has a natural balance point for a reason. Ignoring it forces your muscles to compensate for poor weight distribution. You work harder and get worse results.
Take time to find your cue’s balance point before playing. Position your grip hand appropriately relative to this point. Your muscles will thank you, and your shots will improve.
Follow-Through and Stroke Technique
The stroke itself is where preparation meets execution. A smooth stroke with proper follow-through separates decent players from great ones.
Smooth Pendulum Motion
Think of your forearm as a pendulum hanging from your elbow. The motion comes from your elbow joint swinging freely. Your shoulder stays still. Your wrist stays relaxed. Only your forearm moves.
Practice this pendulum feeling with warm-up strokes. Slide the cue back and forth without striking the ball. Feel the natural weight of your forearm swinging the cue.
Keeping the Cue Level During Stroke
Maintaining a level cue through the entire stroke requires focus. Some players dip the cue during the backswing or lift it during follow-through. Either error changes the contact point on the cue ball.
Watch the cue shaft as you stroke. It should slide straight through your bridge hand without angling up or down. Your bridge hand height determines cue level, so keep it steady.
Finishing Position
After striking the cue ball, your cue tip should finish near the cloth surface. The cue slides forward naturally and comes to rest pointing toward where the cue ball was. Do not force the cue down or pull it back prematurely.
Hold this finishing position briefly after each shot. This habit confirms you completed your follow-through and helps identify any stroke problems.
Developing Muscle Memory
Consistent grip and stroke become automatic through repetition. Practice your fundamentals even when not playing a match. Ten minutes of focused practice on your grip and stroke beats an hour of unfocused play.
Set up simple straight-in shots and focus entirely on your technique. Do not worry about making balls. Worry about how your grip feels, how your bridge looks, and how smooth your stroke moves.
FAQ
Which country invented the pool?
Pool originated in England during the 15th century. The game evolved from outdoor lawn games like croquet and was brought indoors onto a wooden table with green cloth to simulate grass. British officers and royalty played early versions before the game spread worldwide.
What is the best grip for a pool cue?
The best grip for a pool cue is a relaxed grip using your thumb, index finger, and middle finger. Professional players recommend the baby bird analogy: hold the cue firmly enough that it does not slip, but gently enough that you are not squeezing tightly. Most control comes from these three fingers while your ring finger and pinky provide light support.
How to use a pool cue for beginners?
Beginners should start by finding their cue’s balance point and gripping slightly behind it. Place your bridge hand 6 to 8 inches from the cue ball in an open bridge position. Use a relaxed grip with light pressure, keep your wrist loose, and focus on a smooth pendulum stroke. Practice keeping the cue level and follow through completely after each shot.
How do professional pool players grip?
Professional players use a relaxed, controlled grip near the balance point of the cue. Most pros grip with their thumb and first two fingers while keeping the ring finger and pinky loose. Many professionals, including Jasmin Ouschan, recommend the baby bird grip analogy for proper pressure. Pros maintain consistent grip pressure throughout the entire stroke without tightening at impact.
How tight should you grip a pool cue?
You should grip a pool cue loosely enough that your knuckles do not turn white. Use only the pressure needed to control the cue without dropping it. The baby bird analogy works well: hold it securely but gently, like you would hold a small bird without crushing it. Most of the control comes from your thumb and first two fingers.
Should I use an open or closed bridge?
Beginners should start with the open bridge because it provides better visibility of the cue tip and is easier to learn. The open bridge works well for most shots and allows you to see your aim clearly. As you advance, practice the closed bridge for added stability on power shots and when you need extra control.
Conclusion
Learning how to hold a pool cue properly transforms your game from frustrating misses to confident shot-making. The fundamentals covered in this guide work for players at every level. Start with finding your balance point and using a relaxed grip. Build a stable bridge hand that supports the cue without restricting it. Position your body so your stroke moves freely like a pendulum.
Remember the baby bird analogy for grip pressure. Keep your wrist relaxed and your forearm vertical. Follow through completely on every shot. These principles sound simple, but mastering them takes deliberate practice.
Spend time at the table focusing on technique rather than just making balls. Ten minutes of conscious practice on your grip and stroke will improve your game more than an hour of casual play. Pick up your cue, find your balance point, and start building the foundation for better pool in 2026.