
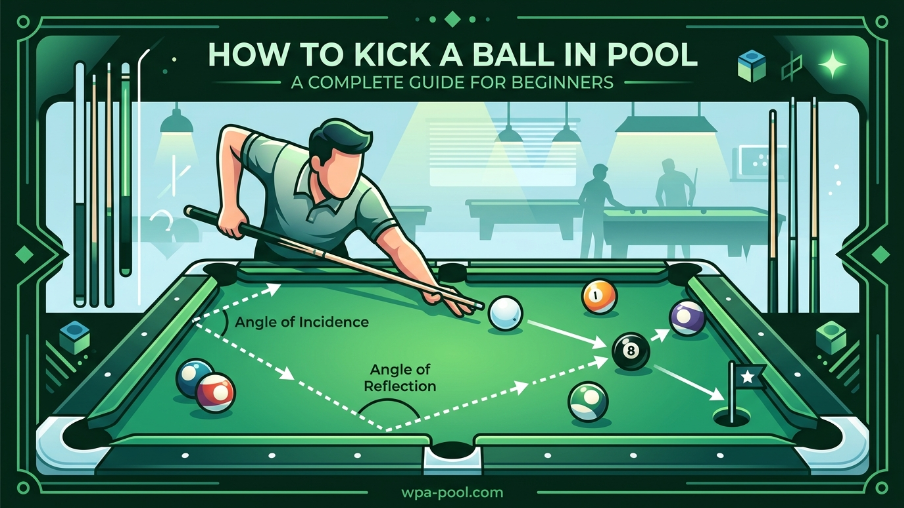
You line up for what looks like a straightforward shot. Your cue ball sits perfectly, but wait – your opponent’s ball is blocking the direct path to your target. You have no clean line to hit the object ball.
This scenario happens in almost every game of 8-ball, 9-ball, or straight pool. Learning how to kick a ball in pool transforms these seemingly impossible situations into scoring opportunities. Instead of playing a defensive safety, you can use the rails to bounce the cue ball and still pocket your ball.
In this guide, I will walk you through everything you need to know about kick shots. You will learn the simple diamond system that pros use, the step-by-step technique for executing your first kick shot, and practice drills you can use at home. By the end, you will have a reliable system for aiming kick shots instead of guessing and hoping.
Table of Contents
What Is a Kick Shot in Pool?
A kick shot in pool is when you strike the cue ball so it bounces off one or more rails before making contact with your intended object ball. The cue ball hits the rail first, changes direction based on the angle of incidence, and travels to its target.
You use kick shots when a direct path to the object ball is blocked by other balls. Instead of giving up on the shot or playing a safety, you use the rails as pathways to reach balls that seem out of reach.
Professional players rely on kick shots constantly. In tournament play, you will see kick shots attempted multiple times per rack because skilled opponents intentionally block direct paths. Knowing how to execute these shots separates beginners from intermediate and advanced players.
Kick Shot vs Bank Shot: Understanding the Difference
Many beginners confuse kick shots with bank shots. The distinction matters because each requires different aiming systems and techniques.
A kick shot involves the cue ball hitting the rail first, then traveling to the object ball. A bank shot involves the object ball hitting the rail first, then traveling to the pocket. In a kick shot, you are sending the cue ball to the object ball. In a bank shot, you are sending the object ball to the pocket.
Here is a quick comparison:
| Aspect | Kick Shot | Bank Shot |
|---|---|---|
| What hits the rail first | Cue ball | Object ball |
| Goal | Hit the object ball | Pocket the object ball |
| Common use | When path is blocked | When pocket is blocked |
| Aiming system | Diamond/mirror system | Mirror angle system |
| Difficulty for beginners | Easier to visualize | Requires more adjustment |
Both shots rely on understanding angles and how balls rebound from rails. Mastering kick shots actually builds the foundation for learning bank shots later.
The Diamond System: Your Visual Guide to Kick Shot Aiming
The diamond system is the most reliable method for aiming kick shots without complex math. Every pool table has small diamond-shaped markers embedded along the rails. These diamonds are not just decoration – they form a geometric grid you can use to calculate kick shot angles.
On a standard table, you will find diamonds spaced evenly along the top, bottom, and side rails. Understanding pool table dimensions and regulation sizes helps you recognize that these diamonds create consistent reference points regardless of table size.
How the Mirror System Works
The mirror system is the simplest diamond-based approach. Imagine the rail as a mirror line. You visualize a “ghost” position of the object ball on the opposite side of the rail, mirrored across the diamond line.
To aim a one-rail kick shot, find the diamond closest to where you want the cue ball to hit the rail. Then imagine the object ball positioned an equal distance on the other side of that rail. Aim at that imaginary point as if you were shooting directly at it.
This visualization technique works because the angle of incidence equals the angle of reflection. When the cue ball hits the rail at a 30-degree angle, it leaves at approximately 30 degrees on the opposite side.
The Parallel Midpoint Method
Another reliable system is the parallel midpoint method. This works well when you need to find the exact aiming point on the rail.
First, draw an imaginary line from the cue ball to the object ball. Find the midpoint of this line. Then draw a line from that midpoint to the rail at a 90-degree angle. The point where this perpendicular line meets the rail is your aiming point.
Both systems eliminate guessing. Instead of hoping your kick shot works, you have a concrete reference point to aim at.
How to Kick a Ball in Pool: The 1-Rail Kick Technique (Step-by-Step)
Now let me walk you through executing a basic one-rail kick shot. This is the foundation all other kick shots build upon.
Step 1: Analyze the Layout
Identify which rail gives you the cleanest path to the object ball. Look for the rail that creates the most direct angle with minimal interference from other balls. Side rails often work better than end rails for shots across the table.
Step 2: Find Your Aiming Point
Using the mirror system, locate the diamond or point on the rail where you want the cue ball to make contact. Visualize the ghost ball position on the opposite side of the rail. Pick a specific spot – not just “somewhere on the rail” but “the second diamond from the corner.”
Step 3: Set Your Stance
Approach the shot from the cue ball position, not from where you think you should stand. Many beginners try to face the rail directly. Instead, stand in your normal shooting stance relative to the cue ball, just as you would for a straight shot.
Your body should align toward the aiming point on the rail, not toward the object ball. This feels strange at first because you are not looking at your final target.
Step 4: Bridge and Aim
Use your standard bridge hand. Place the cue tip close to the cue ball. Focus your eyes on the aiming point you selected on the rail. Do not look at the object ball during your stroke preparation.
Trust your geometry. If you calculated the mirror angle correctly, the cue ball will travel to the object ball after hitting the rail.
Step 5: Execute the Stroke
Use a smooth, level stroke with medium speed. Follow through normally, just as you would on any other shot. Do not jab at the ball or decelerate before contact.
Hitting the cue ball with confidence matters more than perfect technique. Tentative strokes cause more missed kick shots than incorrect aim.
Step 6: Observe and Adjust
Watch where the cue ball actually hits the rail. If it contacts a different spot than you aimed for, your stroke mechanics need work. If it hits the right spot but misses the object ball, your angle calculation needs adjustment.
Table conditions affect kick shots. Faster tables cause the cue ball to rebound at wider angles. Slower tables keep the angle tighter. Make small adjustments based on what you observe.
Speed Control: The Secret to Consistent Kick Shots
Speed control separates good kick shots from great ones. The same aiming point can produce dramatically different results depending on how hard you hit the cue ball.
Soft Speed Kicks
Hitting the cue ball softly creates the most predictable rebound angles. The cue ball loses minimal energy to the rail and maintains a true angle of reflection. Soft speed works best when you need precision over distance.
The downside is travel time. A softly hit cue ball takes longer to reach the object ball, giving it more time to pick up unwanted spin or roll off line.
Medium Speed Kicks
Medium speed offers the best balance for most kick shots. The cue ball compresses the rail slightly, absorbing some energy while maintaining a reliable rebound angle. This is the speed most professionals use for standard kicks.
Medium speed also provides enough momentum for the cue ball to continue moving after hitting the object ball. This helps you maintain position for your next shot.
Hard Speed Kicks
Hard speed causes the cue ball to compress the rail more deeply, which can widen the rebound angle slightly. The cue ball also carries more forward momentum, which can overcome small angle errors.
Use hard speed when you need the cue ball to travel a long distance or when you want to break up clusters after making contact. However, harder shots are less predictable and increase the risk of scratching if you miss the object ball.
Reading Table Speed
Every table plays differently. New cloth is faster and creates wider rebound angles. Old, dirty cloth is slower and keeps angles tighter. Humidity affects rubber rail cushions.
Test a few kick shots early in your session to gauge table speed. Adjust your aiming points accordingly. On fast tables, aim slightly closer to the corner. On slow tables, aim slightly wider.
Using Spin and English on Kick Shots
English – the term for side spin on the cue ball – changes how the ball interacts with the rail. Understanding spin opens up more kick shot possibilities and helps you control the cue ball after contact.
Basic Spin Effects
When you apply right-hand english (hitting the right side of the cue ball), the cue ball spins clockwise. When it hits the rail, this spin grips the rubber and widens the rebound angle to the right.
Left-hand english (hitting the left side) spins the cue ball counterclockwise. It widens the rebound angle to the left.
For beginners, I recommend learning kick shots with center ball first. Master the basic geometry before adding spin complications.
Running English Explained
Running english is the most valuable spin technique for kick shots. It occurs when the cue ball’s natural spin direction matches the direction it will travel after hitting the rail.
For example, when kicking off the left rail toward the right side of the table, right-hand english becomes running english. The cue ball is already spinning right, and it will travel right after the rebound. The spin helps maintain speed and widens the angle slightly.
Running english helps on multi-rail kick shots. It keeps the cue ball moving with energy across multiple cushions. Without running english, the cue ball tends to lose speed and die on long kick routes.
When to Use Spin
Use english when you need to adjust the cue ball’s path slightly or when you need position after contact. One tip of spin (one cue tip width from center) usually provides enough effect without overcomplicating the shot.
Avoid excessive spin as a beginner. Two or three tips of spin magnify any errors in your stroke and make results unpredictable.
2-Rail and 3-Rail Kick Shots
Once you master one-rail kicks, you can extend the concept to multiple rails. These shots look impressive and can rescue you from seemingly impossible situations.
Two-Rail Kick System
For a two-rail kick, the cue ball hits one rail, travels across the table, hits a second rail, and then reaches the object ball. The most common pattern involves hitting a side rail, then the opposite end rail.
Use the same mirror principle twice. First, find your aiming point on the first rail considering where you want the cue ball to hit the second rail. Then calculate the second rail contact point using the mirror system relative to the object ball.
Two-rail kicks work best with running english. The spin helps maintain the cue ball’s energy across both cushions.
Three-Rail Kick System
Three-rail kicks follow the same principles extended further. The cue ball might travel: side rail, end rail, opposite side rail, then to the object ball.
These shots require precise speed control. Too soft, and the cue ball dies before reaching the final rail. Too hard, and angles widen unpredictably.
Professional players use three-rail kicks for safety plays as often as offensive shots. Sending the cue ball around the table can leave your opponent hooked while you maintain control.
Knowing When to Kick Multiple Rails
Do not attempt multi-rail kicks unless necessary. Each additional rail introduces more variables and error potential. If a one-rail kick exists, use it.
Choose multi-rail kicks when no simpler path exists or when the multi-rail route offers better position for your next shot.
Common Mistakes Beginners Make (And How to Fix Them)
After talking with hundreds of players on forums and in person, I see the same errors repeatedly. Here are the most common kick shot mistakes and how to correct them.
Mistake 1: Guessing Instead of Using a System
Beginners often just “hope” their kick shot goes in. They pick a spot on the rail that looks right and shoot. Sometimes it works, usually it does not.
The fix is simple: always use the mirror system or diamond system. Take ten extra seconds to find your aiming point properly. Your success rate will double immediately.
Mistake 2: Poor Visualization
Many players struggle to “see” the ghost ball position or mirror angle. They know the concept but cannot apply it in real time.
Practice visualization away from the table. Look at diagrams online or in books. Trace the angles with your finger. Build the mental pathway before you need it under pressure.
Mistake 3: Inconsistent Speed
Players develop a feel for straight shot speeds but have no reference for kick shots. They hit some too soft and some too hard, creating inconsistent results even with correct aim.
Develop a standard kick shot speed. Practice hitting the same rail point with the same speed ten times in a row. Notice how the cue ball behaves. Build muscle memory for the specific speed that works on your table.
Mistake 4: Ignoring Table Conditions
A kick shot that worked yesterday might miss today because the table changed. Humidity, temperature, and cloth condition all affect results.
Hit a few test kicks early in every session. Note whether the table plays faster or slower than usual. Adjust your aiming points by half-diamond increments based on your observations.
Practice Drills to Master Kick Shots
These drills help you build kick shot skills progressively. Practice them alone to develop confidence before using kick shots in competitive play.
Drill 1: Rail Point Accuracy
Place the cue ball one diamond away from the side rail. Pick a specific diamond on the opposite side rail as your target. Practice hitting that exact diamond without worrying about an object ball.
Goal: Hit your target diamond 7 out of 10 times. This builds the fundamental accuracy needed for all kick shots.
Drill 2: One-Rail Target Practice
Place an object ball near a corner pocket. Position the cue ball so you must kick off the opposite side rail to hit it. Use the mirror system to calculate your aiming point.
Shoot ten attempts. Track how many times you contact the object ball. Do not worry about pocketing it yet – just make contact.
Goal: Make contact 6 out of 10 times. Once you achieve this consistently, start trying to pocket the ball.
Drill 3: Progressive Distance
Start with short kick shots where the cue ball travels less than half the table length. Once you master these, gradually increase the distance.
Longer kick shots amplify any errors in your aim or speed. Mastering short kicks first builds the foundation for longer ones.
Drill 4: Diamond System Challenge
Place the cue ball at various positions around the table. For each position, identify the correct diamond to hit using the mirror system before shooting. Verify your calculation by observing where the cue ball actually goes.
This drill trains your visualization skills. Over time, you will calculate kick angles faster and more accurately.
Drill 5: Speed Control Ladder
Set up the same kick shot repeatedly. Shoot it first with soft speed, then medium, then hard. Observe how the cue ball’s path changes.
Notice which speed produces the most reliable results for your stroke. Most players find medium speed works best, but individual techniques vary.
What is a kick shot in pool?
A kick shot in pool is when the cue ball bounces off one or more rails before hitting the object ball. You use kick shots when a direct path to your target ball is blocked by other balls. The cue ball strikes the rail first, changes direction based on the angle of incidence, and travels to make contact with the intended object ball.
How do you aim a kick shot in pool?
Aim kick shots using the diamond system or mirror system. Find the diamond on the rail where you want the cue ball to hit. Imagine a ghost ball positioned an equal distance on the opposite side of that rail. Aim at that imaginary point as if shooting directly at it. The angle of incidence equals the angle of reflection.
What is the difference between a kick shot and a bank shot?
In a kick shot, the cue ball hits the rail first, then travels to the object ball. In a bank shot, the object ball hits the rail first, then travels to the pocket. Kick shots send the cue ball to the object ball. Bank shots send the object ball to a pocket.
What is running english on kick shots?
Running english is spin applied in the same direction the cue ball will travel after hitting the rail. For example, when kicking off the left rail toward the right, right-hand english is running english. It helps maintain the cue ball’s speed and slightly widens the rebound angle, making multi-rail kicks more reliable.
How does speed affect kick shots?
Speed changes how the cue ball rebounds from the rail. Soft speed produces the most predictable angles but the cue ball travels slowly. Medium speed offers the best balance of predictability and momentum. Hard speed can widen rebound angles slightly and is useful for long-distance kicks but is less predictable.
Should beginners use english on kick shots?
Beginners should learn kick shots with center ball first. Master the basic geometry and diamond system before adding spin. Once you can consistently make contact with center ball, experiment with one tip of running english to see how it affects the cue ball’s path.
Conclusion
Learning how to kick a ball in pool opens up shots that seemed impossible before. Instead of surrendering when your path is blocked, you now have a systematic approach to reach your target using the rails.
Start with the one-rail kick technique and the mirror system. Practice the drills until you can consistently make contact with the object ball. Then gradually add speed control and running english to refine your skills.
Remember that kick shots follow the same physical principles every time. The cue ball does not have a mind of its own. When you apply the diamond system correctly and use consistent speed, you will get predictable results. Your next step is to spend thirty minutes practicing the rail point accuracy drill. You will be amazed how quickly kick shots become a reliable part of your game.