
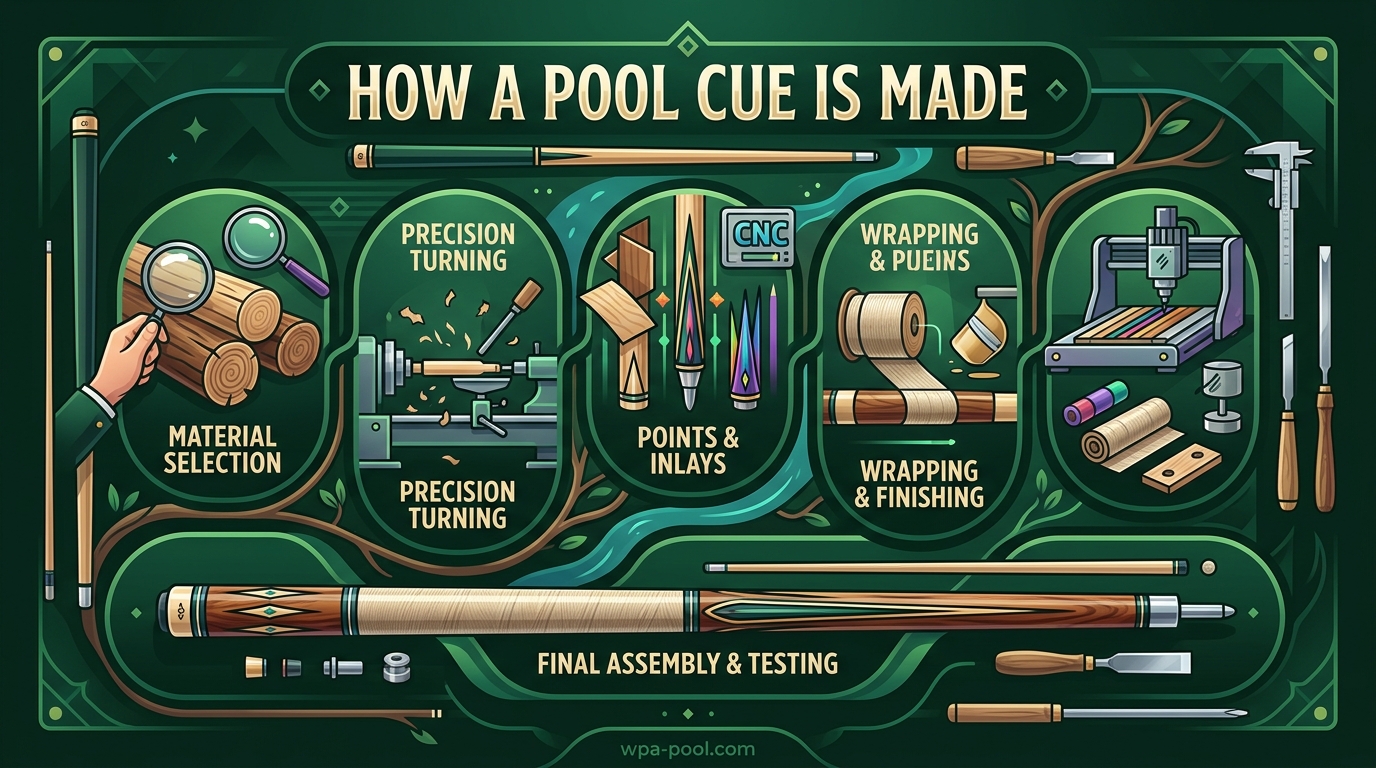
Have you ever held a fine pool cue and wondered about the craftsmanship behind it? I spent months researching how a pool cue is made, talking to professional cue makers and watching countless hours of manufacturing footage. The process combines precision engineering with artistic woodwork in ways that most players never consider.
A quality pool cue starts as raw timber and undergoes over a dozen distinct steps before reaching your hands. From selecting the right hard rock maple to the final lacquer coat, each stage demands specific skills and patience. Understanding this process helps you appreciate why some cues cost $100 while others fetch $5,000 or more.
In this guide, I will walk you through the complete pool cue construction journey. You will learn about wood selection, curing requirements, lathe work, splicing techniques, and what separates custom hand-crafted cues from factory production. Whether you want to buy smarter or start making your own, this knowledge proves invaluable.
The standard 58-inch pool cue length you see in most tournaments results from decades of refinement in this manufacturing craft.
Table of Contents
Wood Selection and Materials: The Foundation of Quality
The journey of how a pool cue is made begins long before any cutting starts. Professional cue makers spend considerable time sourcing and selecting the right wood, knowing that material choice determines performance characteristics for decades. You cannot fix poor wood selection later in the process.
Hard rock maple dominates the shaft market for excellent reasons. This North American wood offers straight grain structure, consistent density, and the right amount of flex for accurate ball striking. Most professional players prefer maple shafts because the material transmits energy predictably from your stroke through to the cue ball.
Ash wood serves as the primary alternative, particularly popular in European cue sports. Ash provides a distinctive feel with slightly more grain visibility and a different flex pattern. Some players swear by ash for its unique feedback during shots, though it requires more careful selection to avoid warping issues.
The butt section of the cue uses a wider variety of exotic hardwoods. Ebony remains the premium choice for high-end cues, offering deep black coloration and extreme density. Cocobolo, rosewood, bocote, and birdseye maple create stunning visual appeal while providing structural mass for proper weight distribution.
Cue makers examine each wood billet carefully before purchase. They look for straight grain patterns, absence of knots, proper seasoning indicators, and consistent coloration. A single cue might require 5-7 years of wood aging before it becomes playable.
The Curing and Drying Process: Patience Prevents Warping
Freshly cut wood contains far too much moisture for cue construction. Professional cue makers cure their wood stock for 6 months to 2 years depending on thickness and species. This waiting period separates quality manufacturers from those producing warping disappointments.
Properly cured wood reaches a moisture content of 6-8%. At this level, the wood becomes stable enough to maintain straightness through temperature and humidity changes. Rushing this process results in cues that warp within months, ruining your investment.
Climate-controlled storage makes a significant difference during curing. Wood stacked in humid environments develops uneven moisture pockets. These inconsistencies create internal stresses that reveal themselves as warps or twists during turning. Professional cue shops maintain dedicated curing rooms with consistent conditions.
Some manufacturers use kiln drying to speed the process, but purists prefer air drying. Air-dried wood tends to retain better structural integrity and shows less tendency toward internal checking. Premium custom cue makers almost exclusively use air-dried stock aged for minimum one year.
Construction Methods: Full Splice vs Half Splice vs Inlay
The splice joint represents one of the most critical structural elements in cue construction. This joint connects the shaft to the butt while maintaining straightness and transferring energy efficiently. Three main approaches dominate the market, each with distinct characteristics.
Full Splice Construction
Full splice cues represent the gold standard for structural integrity. In this method, the shaft and butt materials interlock with precisely cut v-shaped joints extending several inches into the cue. The interlocking pattern creates multiple glue surfaces that resist twisting forces far better than simple butt joints.
Creating a full splice requires cutting matching v-grooves in both shaft and butt pieces. These grooves must align perfectly for the glue joint to succeed. Most quality full splice cues show 4 to 8 distinct points where the shaft wood meets the butt material.
The visible points on a full splice cue are not merely decorative. They represent the structural intersection of shaft and butt materials. More points generally indicate more structural integrity, though 4-point and 6-point designs remain most common for optimal performance.
Half Splice Construction
Half splice construction offers a compromise between structural integrity and manufacturing efficiency. In this method, the splice joint extends partway through the cue rather than the full depth. The remaining section uses a simpler joint structure covered by decorative materials.
Half splice cues cost less than full splice equivalents while maintaining reasonable playability. The construction method allows for more elaborate decorative work on the butt section since the structural demands decrease. Many production cues in the $200-500 range use half splice construction.
Performance differences between full and half splice cues matter most to advanced players. Beginners and intermediate players rarely notice the subtle differences in energy transfer and feedback. However, the structural longevity advantage of full splice becomes apparent over decades of use.
Inlaid and Decal Construction
Inlaid cues create visual effects by cutting recesses into the cue surface and filling them with contrasting materials. This technique allows virtually unlimited design possibilities including intricate patterns, logos, and images. Premium inlaid cues represent hundreds of hours of skilled handwork.
Decal cues offer a more affordable approach to decoration. Modern printing techniques can apply detailed designs directly to the cue surface under a protective clear coat. While lacking the tactile depth of true inlays, quality decals provide attractive appearance at accessible price points.
The construction method affects more than appearance. Full splice joints handle impacts and environmental changes better than simpler constructions. When evaluating cues, examine the joint area closely for signs of quality construction versus superficial decoration.
Turning and Tapering: Precision on the Lathe
The lathe transforms squared wood stock into the cylindrical cue shape. This step demands exceptional precision since variations of even a few thousandths of an inch affect playability. Professional cue makers use metal lathes rather than wood lathes for the accuracy required.
A metal lathe provides the rigidity and precision control necessary for consistent results. Wood lathes lack the stability to maintain the tight tolerances cue making requires. The chuck holds the wood firmly while cutting tools remove material in carefully calculated passes.
The taper ratio determines how the cue diameter changes from butt to tip. Most pool cues use a pro taper in the first 12-14 inches behind the tip, maintaining consistent diameter before beginning the gradual reduction toward the butt. This design provides consistent contact feel regardless of bridge distance.
European taper cues reduce diameter more gradually along the entire length. Some players prefer this continuous taper for certain shots. The choice between pro taper and European taper remains largely personal preference rather than objective superiority.
Final shaft diameter at the tip typically measures 12mm to 13mm for pool cues. Snooker cues run slightly smaller at 9mm to 10mm. Break cues sometimes feature thicker 13mm+ tips for maximum power transfer. Each specification serves different playing styles and game requirements.
Surface finish from the lathe requires careful attention. Tool marks must be sanded out completely since any irregularity affects how the cue slides through your bridge hand. Most makers progress through multiple grits from 80 to 400 before moving to finishing operations.
Coring and Weight Distribution: Engineering the Feel
Modern cue making often involves removing the center of the butt section and replacing it with engineered materials. This coring process allows precise control over weight and balance that solid wood construction cannot achieve. The technique separates contemporary cues from historical designs.
A gun drill creates the central channel through the butt wood. This specialized drilling equipment maintains straightness over long distances while removing material efficiently. The resulting core accepts various fillers depending on desired weight and balance characteristics.
Phenolic resin cores provide consistent density and stability. Unlike wood, phenolic does not absorb moisture or change dimensions with humidity. This stability helps maintain the cue’s balance point and overall weight regardless of environmental conditions.
Weight bolts installed in the core allow customization. Players can add or remove bolts to shift the balance point and total weight. Most production cues include this system, while custom makers sometimes build to specific customer specifications from the start.
The balance point typically sits 18-20 inches from the butt end for optimal feel. This positioning creates the right moment arm for stroke mechanics while preventing the cue from feeling too heavy in either hand. Coring placement directly affects where this balance point falls.
Points and Inlays: Where Art Meets Function
The decorative elements on a cue often involve as much work as the structural components. Veneer points, inlays, and decorative rings transform functional equipment into personal statements. These details separate mass production from artisan craftsmanship.
Veneer points are thin slices of contrasting wood layered into the cue surface. Makers cut precise slots at the splice joint, insert veneers of different colors, then turn the surface smooth. The resulting pattern shows diamond or triangular shapes depending on the cut geometry.
Inlaid points require cutting recesses into the solid cue surface and filling them with contrasting materials. This technique allows for more complex patterns than simple veneers. Mother of pearl, abalone, exotic woods, and even precious metals appear in high-end cue inlays.
Decorative rings typically appear at joint collars and the wrap transition. These thin bands of contrasting material add visual interest while marking structural transition points. Ring designs range from simple single-line inlays to elaborate multi-layer patterns.
The precision required for quality inlay work is extraordinary. Cuts must be accurate to within thousandths of an inch for the pieces to fit without gaps. A single complex cue might require 40-60 hours of inlay work alone.
Modern CNC machinery enables some decorative work that would be prohibitively time-consuming by hand. However, purists value hand-cut inlays for their slight variations that give each cue unique character. Both approaches produce beautiful results when executed skillfully.
Ferrule and Tip Installation: The Business End
The ferrule serves as the critical connection between shaft and tip. This small component absorbs impact shock and protects the shaft wood from splitting. Ferrule material choice significantly affects how the cue plays.
Phenolic resin ferrules dominate modern cue construction. This hard, dense material transfers energy efficiently to the tip while resisting compression. The material also machines cleanly, allowing precise diameter matching to the shaft end.
Some traditional makers still use ivory ferrules, though ethical and legal concerns limit this practice. Aged ivory offers unique playing characteristics that some enthusiasts prefer. Synthetic alternatives now replicate ivory properties without the associated issues.
Tenon joints connect ferrules to shafts with maximum strength. The ferrule receives a protruding tenon that inserts into a matching mortise in the shaft end. This interlocking design prevents the ferrule from separating under impact forces.
Leather tips provide the actual contact surface with the cue ball. Tip installation involves roughing the glue surface, applying adhesive, and clamping until cured. After installation, the tip must be shaped to the proper radius and texture.
Tip hardness affects play significantly. Soft tips hold chalk better and provide more spin but wear faster. Hard tips last longer and transfer more power but require more precise chalking. Medium tips offer compromise for most players.
Joint Assembly: Connecting Shaft to Butt
The joint system allows two-piece cues to separate for transport while maintaining perfect alignment during play. Joint design directly affects cue feel and durability. Several competing approaches serve different needs and preferences.
Stainless steel joints with 5/16-18 pins represent the most common configuration. The 5/16-inch diameter pin threads into the butt with 18 threads per inch. This size offers good strength without excessive bulk that would weaken the shaft.
Some manufacturers use different thread pitches or pin diameters for proprietary systems. These variations often claim improved alignment or connection security. However, the 5/16-18 standard remains dominant for good reason after decades of refinement.
Quick-release joints use a partial-turn connection instead of multiple thread rotations. These systems speed assembly during games where time matters. The tradeoff involves slightly more complex manufacturing and potential wear issues over time.
Joint collars protect the wood surrounding the connection point. These rings of hard material prevent the shaft from splitting at its most vulnerable point. Collar materials include various plastics, phenolic, and exotic hardwoods.
Alignment precision determines whether the cue plays straight. Even tiny misalignments between shaft and butt affect shot accuracy. Quality cues maintain concentricity within thousandths of an inch throughout the joint area.
The Finishing Process: Protection and Beauty
Raw wood requires protection from moisture, oils, and physical damage. The finishing process builds a protective layer while enhancing visual appeal. Multiple coats of finish create depth and durability.
Sanding progresses through finer grits before finishing begins. Most makers start around 220 grit and progress to 600 or finer. This preparation ensures the finish applies smoothly without highlighting surface imperfections.
Lacquer finishes dominate commercial cue production. This clear coating dries hard and resists most environmental damage. Multiple thin coats build better protection than single thick applications that might crack or peel.
Polyurethane offers an alternative with different durability characteristics. This finish resists moisture and chemicals better than traditional lacquer. Some players prefer the feel of polyurethane-coated cues in their bridge hand.
High-gloss finishes show off wood grain and decorative elements effectively. However, some players prefer satin or oil finishes for reduced glare and different tactile feedback. The choice affects both appearance and playability.
Finish curing takes days to weeks depending on type and application method. Rushed curing results in soft finishes that damage easily. Quality manufacturers allow adequate time for full hardening before shipping.
Custom vs Production Cues: Understanding the Differences
The manufacturing approach dramatically affects both price and quality. Factory production cues serve mass markets while custom makers create individual pieces. Understanding these differences helps you make informed purchasing decisions.
Custom cue makers typically require 10-12 weeks for completion of a single cue. Some high-demand makers have waiting lists extending to years. This timeline reflects the handwork involved and the maker’s existing commission queue.
Factory production operates on completely different timelines. Automated machinery produces cues in days rather than weeks. CNC lathes, automated finish systems, and standardized components enable this efficiency.
A handmade cue created by yourself requires 2-10 days of actual work depending on skill level and available tooling. However, this estimate excludes the years of wood curing and learning curve that precede successful results. Most DIY enthusiasts take months to produce their first playable cue.
Quality indicators differ between custom and production cues. With custom work, examine the maker’s reputation and previous work. For production cues, look for consistent straightness, clean inlay work, and proper joint fit.
The most expensive cue sticks can cost $50,000 or more, typically involving precious materials and hundreds of hours of decorative work. These pieces often function more as art objects than sporting equipment, though they play excellently.
Tools and Equipment Needed for DIY Cue Making
Starting cue making requires significant equipment investment. The precision demands of quality construction exclude most casual woodworking tools. Understanding requirements helps you plan your approach.
A metal lathe serves as the centerpiece of any serious cue shop. While wood lathes handle basic turning, only metal lathes provide the precision and rigidity needed for professional results. Expect to invest $3,000-10,000 for suitable equipment.
Additional tooling includes chucks, cutting tools, measurement equipment, and finishing supplies. A quality chuck that holds work concentrically costs several hundred dollars alone. Precision measuring tools add more expense but prove essential.
Many successful cue makers recommend starting with basic equipment and upgrading as skills develop. Beginning with simpler projects on affordable machinery lets you learn without massive initial investment. You can always sell beginner equipment when upgrading.
Professional cue makers often mention that the principles behind cue construction are straightforward. The challenge lies in executing those principles with the precision required for quality playability. Practice and patience matter more than expensive tools in the long run.
How to Identify Quality Construction When Buying
Examining cues before purchase helps you avoid disappointment. Several quick checks reveal construction quality regardless of price point. These skills serve you well whether buying new or used equipment.
Roll the cue on a flat surface to check straightness. Any wobble indicates warp or taper irregularity. Quality cues roll smoothly without hopping or deviation.
Examine the joint fit carefully. Threaded connections should engage smoothly without binding or looseness. The shaft and butt should align perfectly when assembled.
Inspect the finish under good lighting. Look for dust inclusions, orange peel texture, or thin spots. Quality finishes appear smooth and consistent throughout.
Check inlay work for gaps or misalignment. Quality inlays sit flush with surrounding surfaces without visible seams. Points should be symmetrical and evenly spaced.
How a Pool Cue Is Made: The Complete Process Summary
Understanding how a pool cue is made transforms how you view your equipment. Each step from wood selection through final finishing contributes to playability and longevity. The craftsmanship behind quality cues justifies their investment.
Whether you purchase a production cue or commission a custom piece, this knowledge helps you evaluate options. You now understand why curing matters, what construction types offer, and how to spot quality. This foundation serves both buyers and aspiring makers.
The best cue for you depends on your budget, playing level, and aesthetic preferences. Production cues from reputable manufacturers serve most players excellently. Custom cues become worthwhile investments as your skills and appreciation for craftsmanship develop.
FAQ
What is the best wood for a pool cue?
Hard rock maple is considered the best wood for pool cue shafts due to its straight grain, consistent density, and optimal flex characteristics. For the butt section, exotic hardwoods like ebony, cocobolo, rosewood, and bocote are prized for their beauty and density. The ideal cue wood has been properly cured for at least one year to reach 6-8% moisture content.
How long does it take to make a pool cue?
A custom hand-crafted pool cue typically takes 10-12 weeks to complete. Factory production cues can be manufactured in days using automated machinery. If making a cue yourself as a DIY project, expect 2-10 days of actual work, though this excludes the years of wood curing and learning curve required.
What’s the most expensive cue stick?
The most expensive cue sticks can cost $50,000 or more, often featuring precious materials like gold, ivory, exotic woods, and intricate hand-cut inlays requiring hundreds of hours of work. These high-end pieces often function as art objects while maintaining excellent playability.
Which country invented pool?
Pool evolved from billiards, which originated in England during the 15th century. The modern game of pocket billiards (pool) developed in the United States in the 19th century, evolving from English billiards and snooker traditions.
Conclusion
Learning how a pool cue is made reveals the remarkable craftsmanship behind this essential equipment. From selecting premium hard rock maple through the precision lathe work and careful finishing, each step demands skill and patience. The distinction between mass production and custom hand-crafting becomes clear when you understand the process.
I hope this guide helps you appreciate your equipment more fully and make informed decisions when purchasing. Whether you choose a $200 production cue or invest in a $2,000 custom piece, you now understand what separates quality construction from disposable alternatives.
If you are considering making your own cues, start with basic equipment and simple designs. The journey requires significant investment in both tools and time, but many find cue making deeply satisfying. Begin by mastering wood selection and curing before attempting complex inlay work.
Your pool cue represents a fascinating intersection of engineering and artistry. Treat it well, and it will serve you faithfully for decades of play.